How to Wash Cross Stitch [Includes Video Tutorial]
When I first decided to wash my finished cross stitch, I was hesitant.
What if I ruin my work? That was my biggest concern. However, I’m here to put you at ease. It’s highly unlikely that will ruin your project.
I always wash my cross stitch if possible. There’s just something about washing my stitching that fills me with happiness. I think it’s the smell of the soap.
After washing, my project feels so clean and fresh.
WANT FREE CROSS STITCH PATTERNS?
Sign up for my newsletter to get access.

Should You Wash Your Cross Stitch?
I imagine that you are here because you want to learn how to properly wash your finished stitching.
However, if you are still on the fence about whether you want to wash your stitching or not, check out my article on if you should wash your cross stitch.
There are pros and cons to washing finished projects.
Materials You Will Need
- Mild Soap (Dawn Original Dish Soap, Baby Shampoo, or Lingerie Detergent)
- Wash Basin, Sink, or Bathtub
- Towels
- Your Finished Cross Stitch
Step-By-Step Process for Washing Cross Stitch
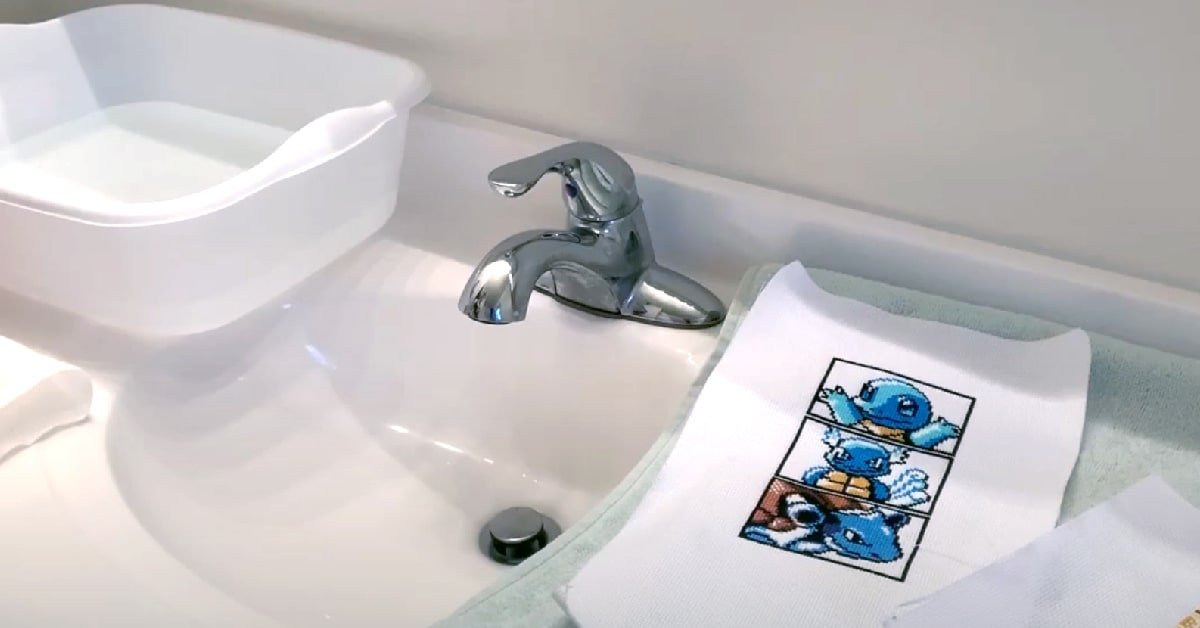
Fill basin, sink, or tub with lukewarm to cold water.
I mostly use cold water because there is less of a chance for threads to bleed. I do sometimes use warm water to activate the soap more on tough stains.
If you have hard water you may want to use distilled water.
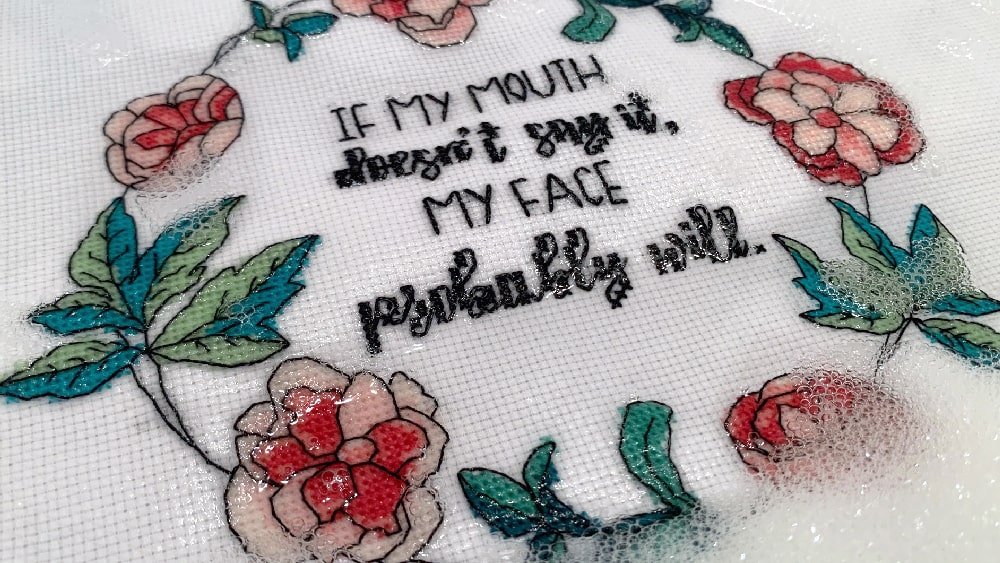
Add a little bit of your detergent.
In this example, I am using Soak. It’s a lingerie detergent that doesn’t need to be rinsed out. I still rinse it though. The scentless variation is the best for cross stitch, but I have the Yuzu on hand. It smells SO good!
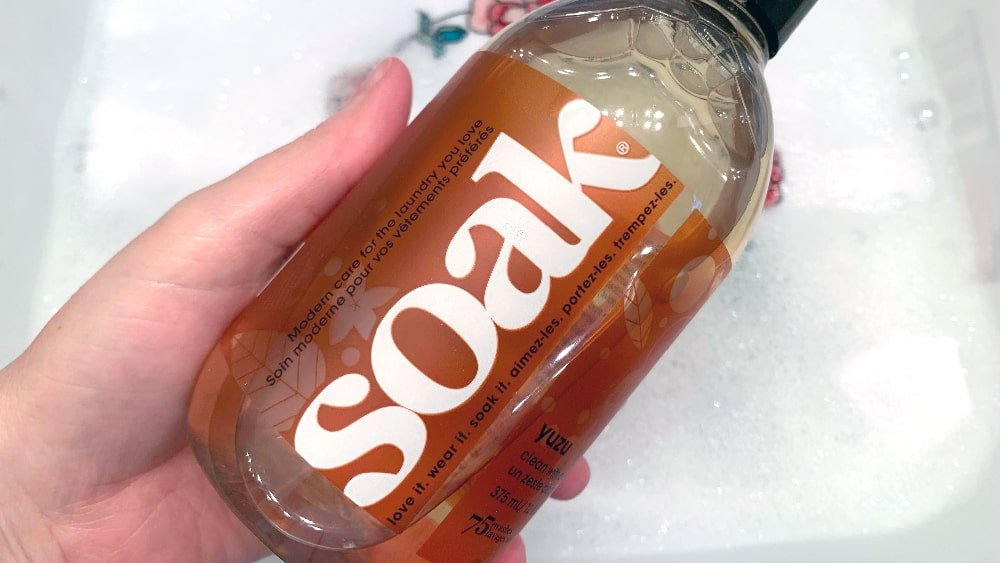
I have used dish soap and baby shampoo as well. You will just want to use a mild soap that is gentle on your stitching and won’t leave a residue.
Make sure that the detergent is completely dissolved in the bath.
If your piece is stained, you may want to pretreat your stitching. Soak your project in Oxyclean or spot treat the area.
Let your stitching soak.
The time in which you leave your stitching to soak depends on your preference. I will let my pieces soak from 10 mins to 30 mins. The dirtier your pieces are, the longer you will want them to soak.
Again, if they were pretreated, this process shouldn’t take as long.
I swish the stitching around every once in a while to make sure that all areas are being cleaned. The more you play with the fabric the more effective the detergent will be. You will be lightly agitating the fabric, helping the detergent to work.
Disclaimer: There may be some areas where it looks like my threads are bleeding onto the fabric. They aren’t. The color is coming from the threads in the back.
Although if you are worried the colors might bleed, use a Color Catcher.
Rinse your stitching.
Use cool water to rinse your piece. Make sure to wash away all the soap.
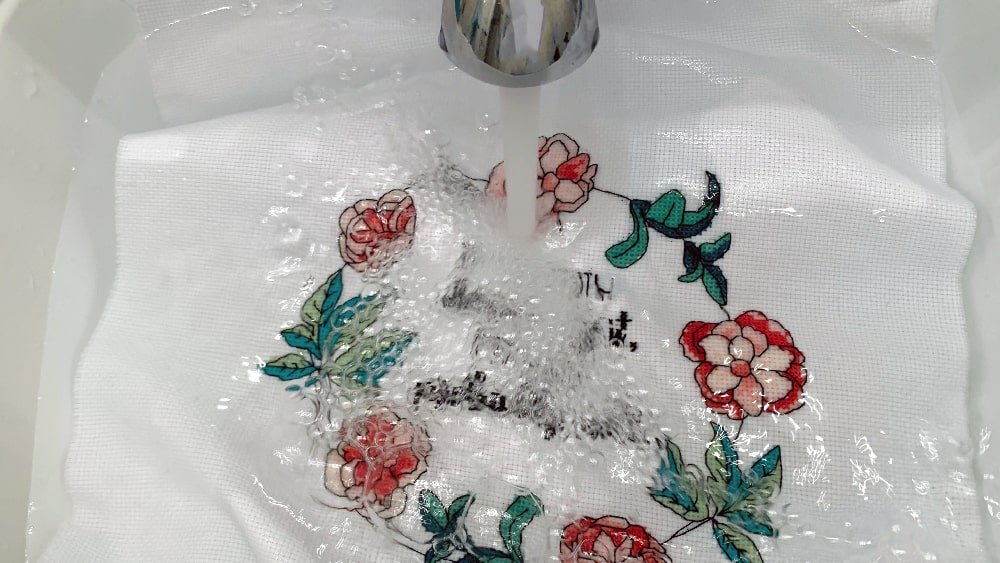
Although Soak is a no-rinse detergent, I still rinse it out. This ensures that there will be no residue left on my stitching. However, if I didn’t do the best job rinsing, the detergent will not harm my project.
Press the excess water out and hang dry.
I sandwich my clean stitching between 2 towels or half of the same towel and press the extra water out.
I have tried rolling my project in the towel and pressing it, but I have found that this creates more wrinkles that are harder to get out.
For bigger pieces, I will leave the project on the towel to air dry, but my preferred method is hang drying.
What to do After Your Project is Clean
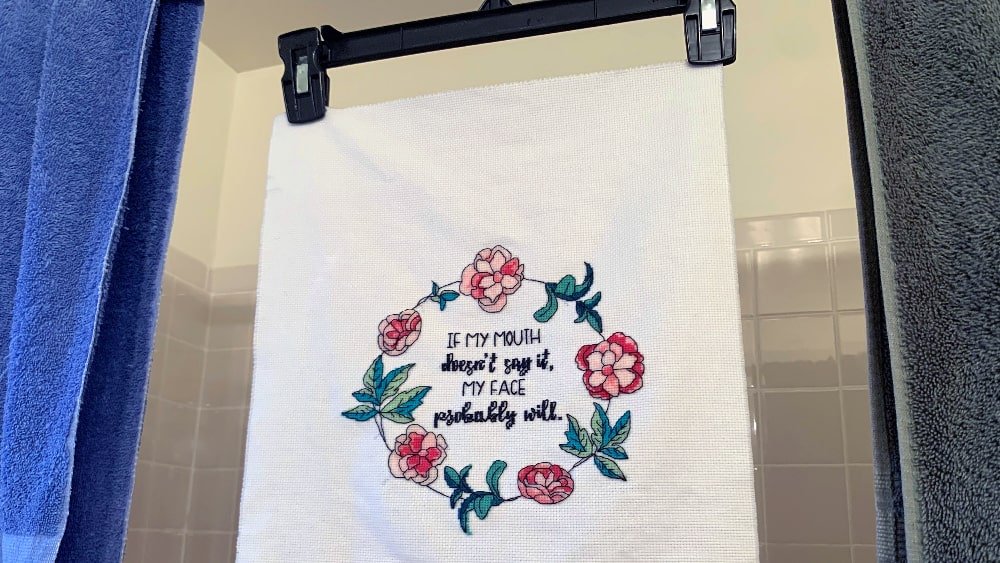
Before your stitching is completely dry, you will want to iron your clean piece.
In my experience, the best time to iron is while the stitching is still slightly damp. You will get a flatter, wrinkle-free result.
One of my biggest pet peeves is when stitchers frame wrinkled work. They work so hard and their stitching is beautiful, but I am distracted by the creases.
Ironing your piece will give your stitching a more polished and professional appearance.
Now comes the fun part. After your stitching is cleaned and pressed, it’s time to decide how you want to finish your project.
There are tons of different ways you can go about finishing your work.
Final Thoughts
The first time washing your project can be scary. After that, you’ll realize that you had nothing to fear.
Remember, if you are unsure about washing your project, test a small, unseen area.
There are a few instances when I would not wash my stitching. Use your best judgment.
Cleaning your finished work can be so rewarding. In the end, you will have a beautiful, crisp stitching that reflects all your hard work and effort.
Happy Stitching!