
How to Stitch Blends with the Loop Method
Are you tired of your blends looking speckled more than creating a smooth transition from light to dark colors?
Previously, I never cared for blends. I never liked the look of my blends until I created this method. I would have rather just used an “in-between” floss color. Problem solved.
To me, blends are supposed to produce a smooth gradient, but in reality, they look choppy. The inconsistencies in the color are great if you are looking to add texture, but for most of us, this is not the case.
Not only does the traditional method of creating blends not achieve the desired result, but if you are like me, you will have to give up the loop method for another method to start your blends.
However, I love the loop method.
If you also love starting with the loop method and want to know how to stitch better-looking blends then continue reading.
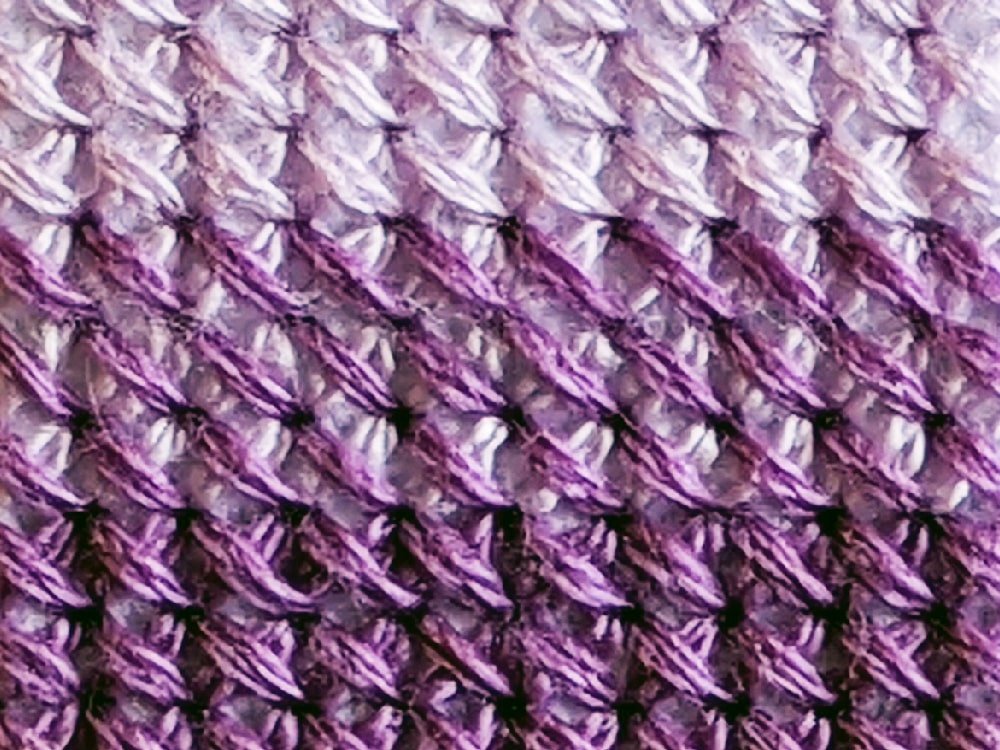
Keep in mind that these are close-up photos and cross stitch blends are meant to be seen from far away, not with your face right up against your stitching.
WANT FREE CROSS STITCH PATTERNS?
Sign up for my newsletter to get access.

What is a blend in cross stitch?
Blended threads are used to create a middle shade of dark and light colors. They can also be used to achieve a layer of texture.
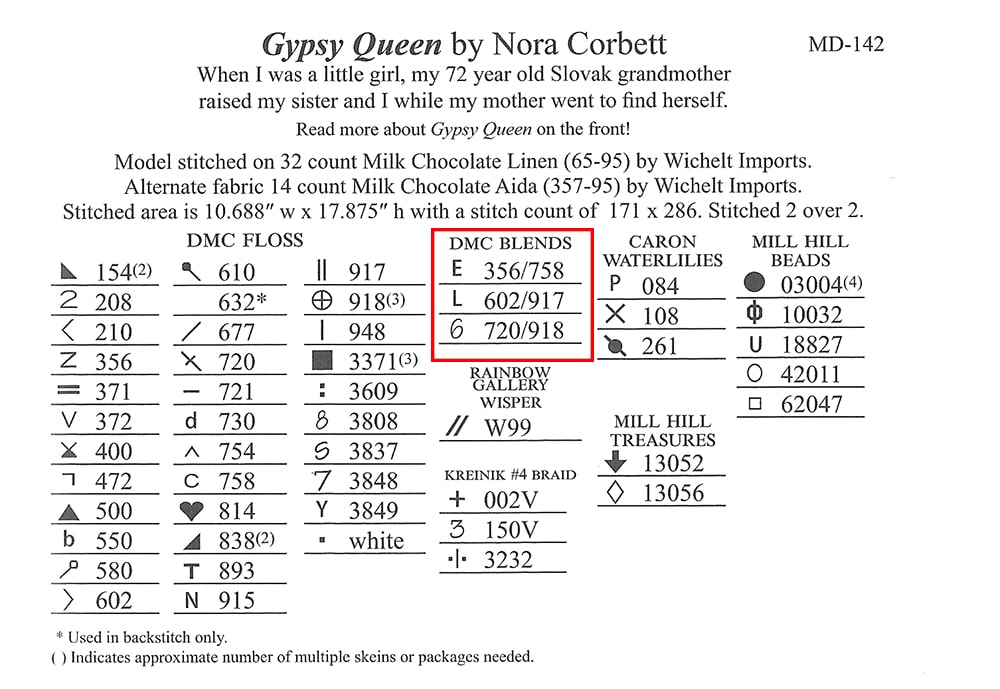
This will appear as two numbers next to a symbol on your chart.
How do you blend threads in cross stitch?
You use one strand of one color and one strand of another color to create a blend.
Traditionally, you would start by stitching over the tail. There are also other options for starting blends but this was my preferred method.
I don’t know about you, but I can’t stand how there isn’t uniformity in the appearance of the color. The darker/lighter thread never stays on the same side, nor do I have the patience to make sure that all my stitches match perfectly.
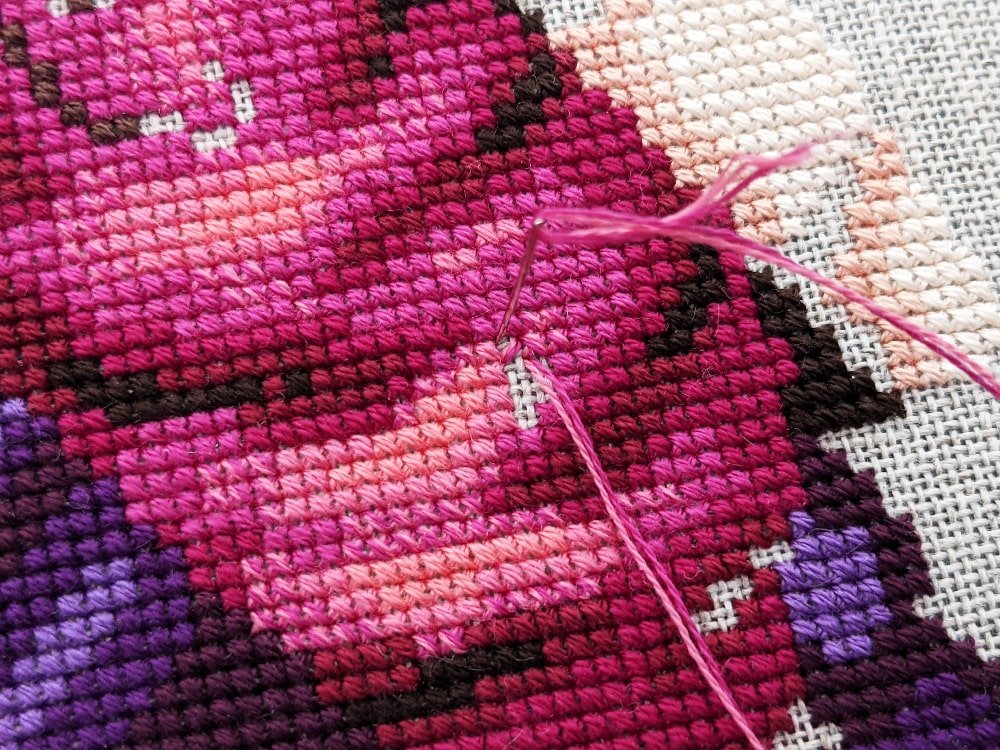
My New Technique for Stitching Blends
It’s really simple.
Take your first color (starting with the loop method) and stitch half stitches as you normally would. Then take your second color (again starting with the loop method) and stitch half stitches in the opposite direction to complete your stitches.
Instead of stitching both threads at the same time, one cross stitch at a time, you are stitching the colors separately and layering them, producing a more even gradient.
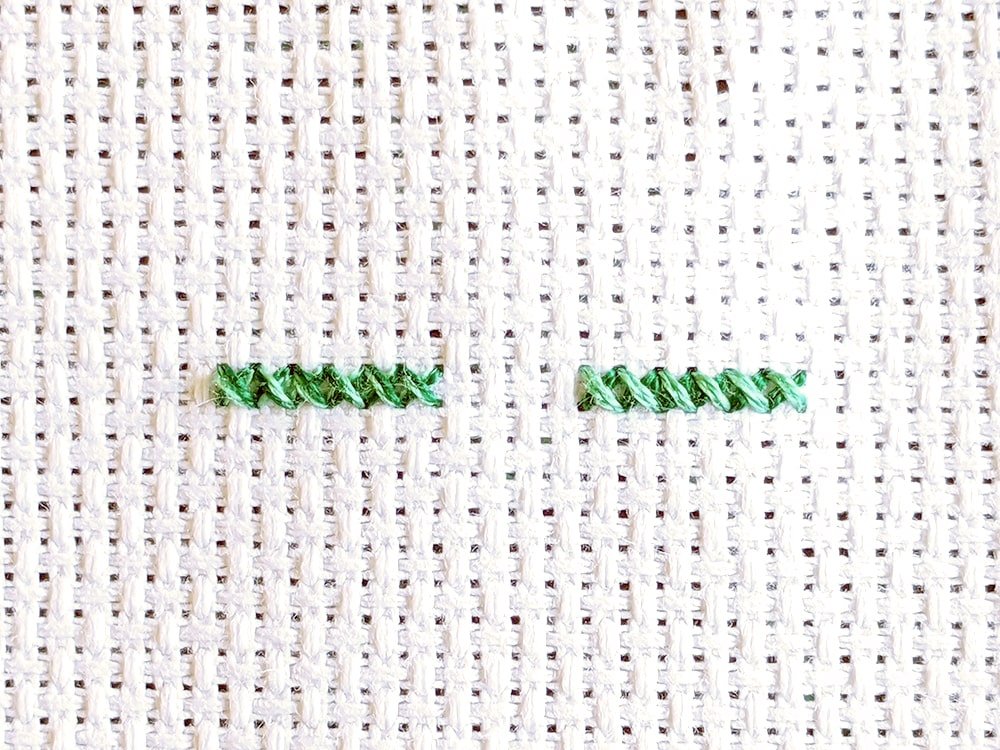
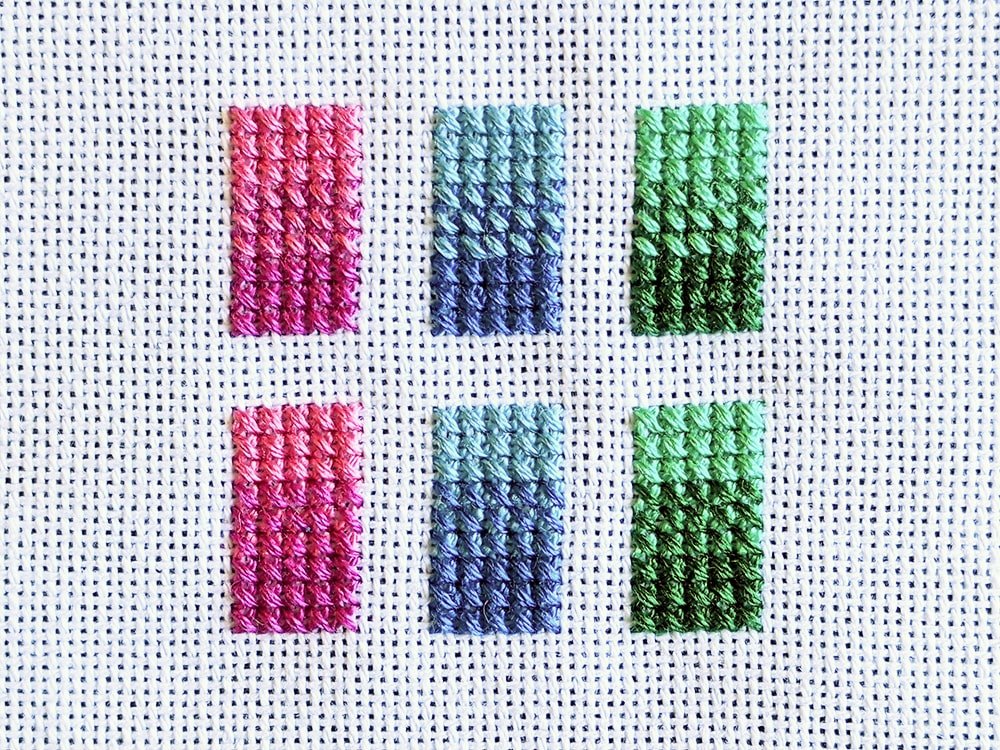
The choice is up to you whether you want the lighter or darker color on the bottom or top. Either will produce slightly different variations. No matter which you choose, be consistent throughout your project.
The lighter color on top will produce a slightly lighter middle color, while the darker color on top will produce a slightly darker middle color.
Personally, I think that I like the lighter color on top. I feel that it blends more while having the darker color on top produces a striping, which you don’t notice far away anyway. Just my opinion.
Which do you prefer? Experiment with both and see which one you like more. Let me know in the comments. I would love to hear your opinions!
Final Thoughts
This technique works because of the way our eyes view colors. It’s similar to the dotting effect of comic books or using colors to create a 3D effect. The overlapping of colors will produce a new color.
I got the idea because designers will use half stitches to create fades and add translucency. So why couldn’t these same principles be used to create blends?
If you are curious how my stitches are so neat, check out my tips for stitching better-looking stitches.
Happy Stitching!
This is one of those things where I genuinely feel a bit of an idiot for never having thought to do it! So simple but looks so much smoother – I can’t wait to try on my next project with blends. Thanks!
Don’t worry I felt the same way. I have a bunch of in WIPs with blends that I already started and can’t wait to actually use this method in a project.
In the past pandemic while, I’ve listened to many stitchers complain, some bitterly, about blended thread in patterns. I don’t get the hate for blended thread stitching. It multiplies a palette of thread colors exponentially. We can complain about this, but why, unless we’re that spoiled for choice? When advanced color shading is what is wanted, then your single thread, loop start, different leg-different thread color approach rocks! What I have found in my stitching journey is that if a heathered color look is what is wanted, then stitching two colors as one gets there. Heathered colors can be magical if only because one can take a tan, or gray, or beige thread (or any color used as a base), put it with a deep tone (or a pastel tone) and get those old-timey weathered hues. This color approach can transform/elevate a two-toned pattern. Blending a solid color thread with a long pattern variegated thread creates a convincing marbling effect, useful in solid-stitched borders or larger stitching areas, like for vases.
Thank you. I agree that each method has its place.
Hi, I have a kit that uses 11 count aida and calls for blended threads, but the pattern doesn’t state which color to use for 2 threads and which color to use for 1 thread. I haven’t been able to find an answer online. The pattern reads like this:
Mixed Full stitch
No. Symbol DMC
31 5 930
28 ^ 926
13 ( 503
07 # 436
13 & 503
28 @ 926 etc
Does this mean that I use 2 strands of no. 31 – DMC 930 and 1 strand no. 28 – DMC 926 for that particular mix, and 2 strands 503 and 1 strand 436 etc?
Thanks in advance.
I’m honestly not sure. To me it looks like you use one strand of the color on the left and one strand of the color on the right with the symbols in the middle. I would reach out to the manufacturer if possible.