
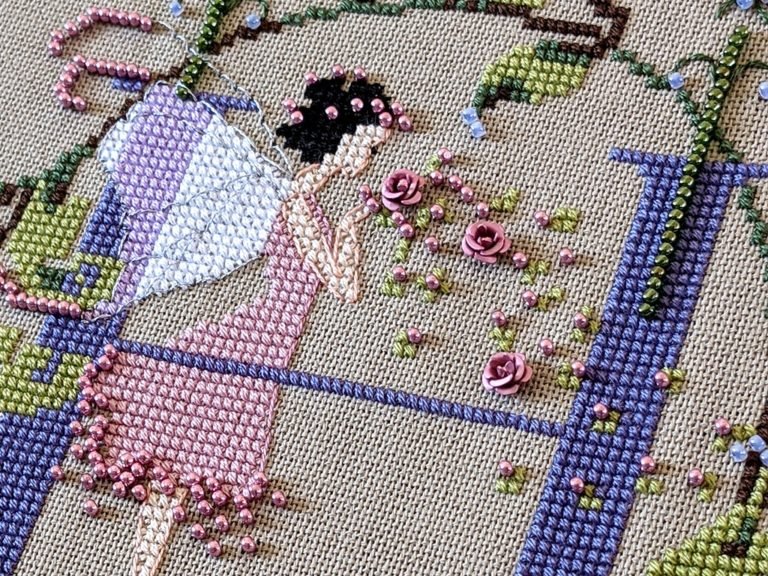
Letters from Nora by Nora Corbett: M Fairy
This pattern is part of the Letters from Nora series by Nora Corbett. I recommend these smaller designs to beginners wanting to stitch a Mirabilia. They work up quickly and are fun to stitch.
I’ll admit I am obsessed with stitching these letters up for newborns (or anyone really).
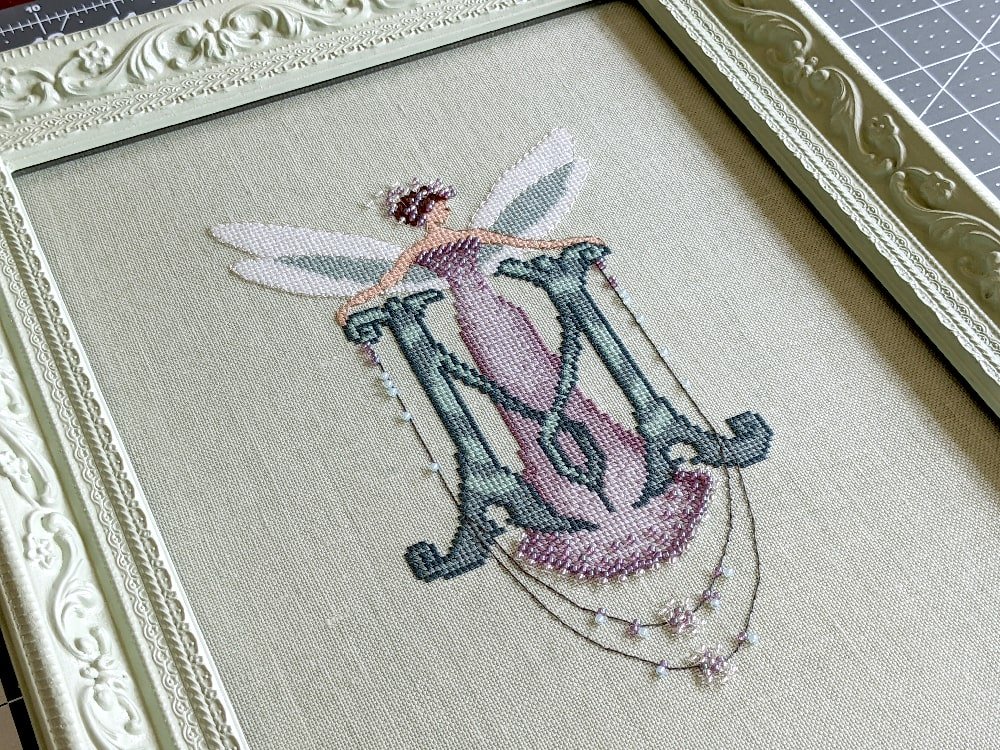
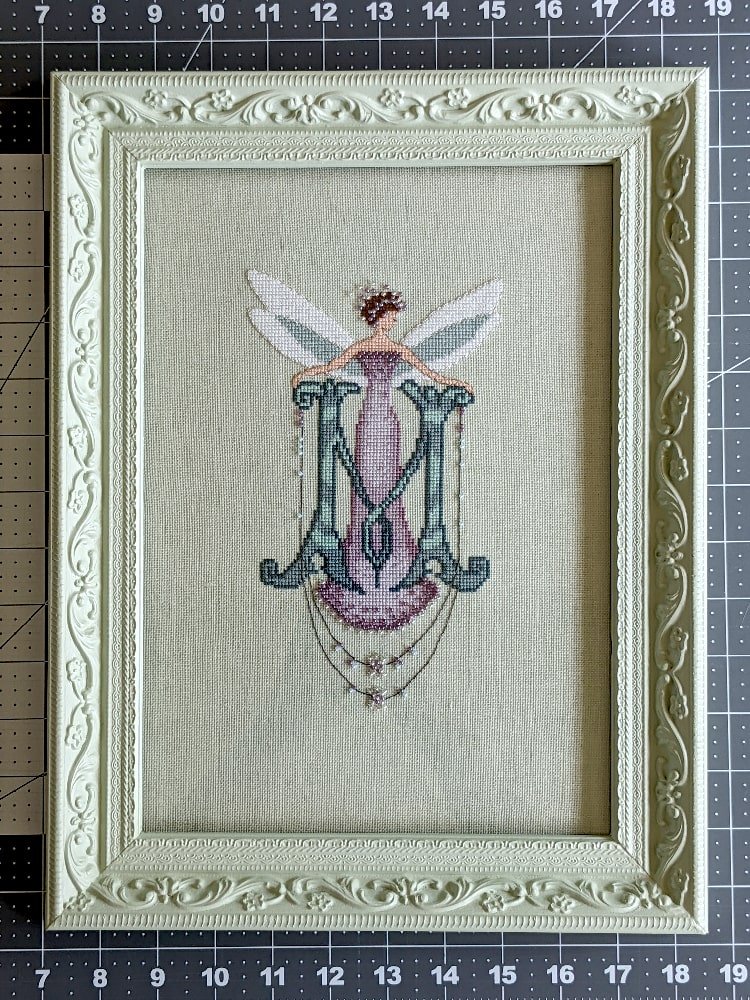
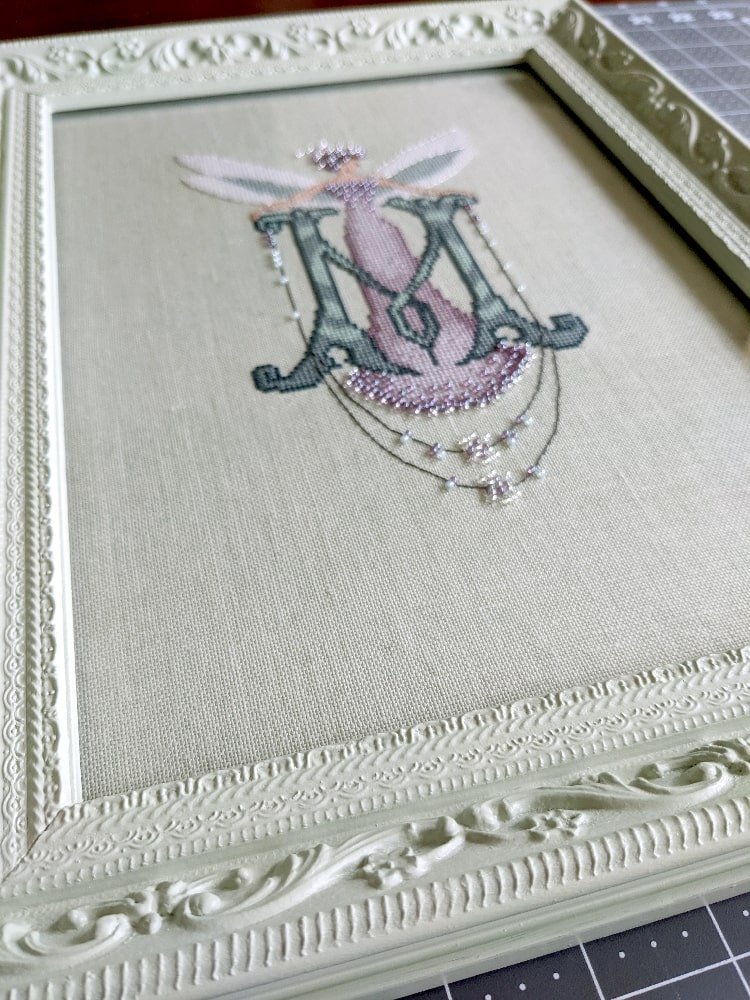
However, this finished project is special because it is for my new niece, Maya.
From the colors to the custom frame that I did myself, I went above and beyond to make this project perfect!
Here’s my fairy conversion and how I customized this FFO.
Finished Dimensions
This fairy is 76 stitches wide by 128 stitches high.
Even though I stitched her on the called-for 32-count Waterlily linen, she ended up being slightly smaller at 4.5 inches by 7.75 inches. She probably shrank a tiny bit when I washed her.
The inside measurements of the frame are 8.75 inches by 12 inches.
All in all, she wasn’t too big (none of the fairies really are), but also not too small. Because I didn’t add a mat board, that cut down on the size of the finished project.
Letters from Nora M Color Conversion

Classic Colorworks to DMC
Vintage Violet > 927 Light Gray Green
Cloud > blanc
Cobbled Peach > 754 Light Peach
La Tierra > 898 Very Dark Coffee Brown
Hickory Sticks > 3031 Very Dark Mocha Brown
Smoke > 924 Very Dark Gray Green
Deep Fennel > 926 Gray Green
Lettuce Leaf > 3817 Light Celadon Green
Desert Mesquite > 3041 Medium Antique Violet
Eve’s Leaves > 3042 Light Antique Violet
Lemon Lime > 3743 Very Light Antique Violet
Wisconsin Woods > 840 Medium Beige Brown
Old Blue Jeans > 3799 Very Dark Pewter Gray
Kreinik #4 Braid 3514 > E168 Light Effects Silver
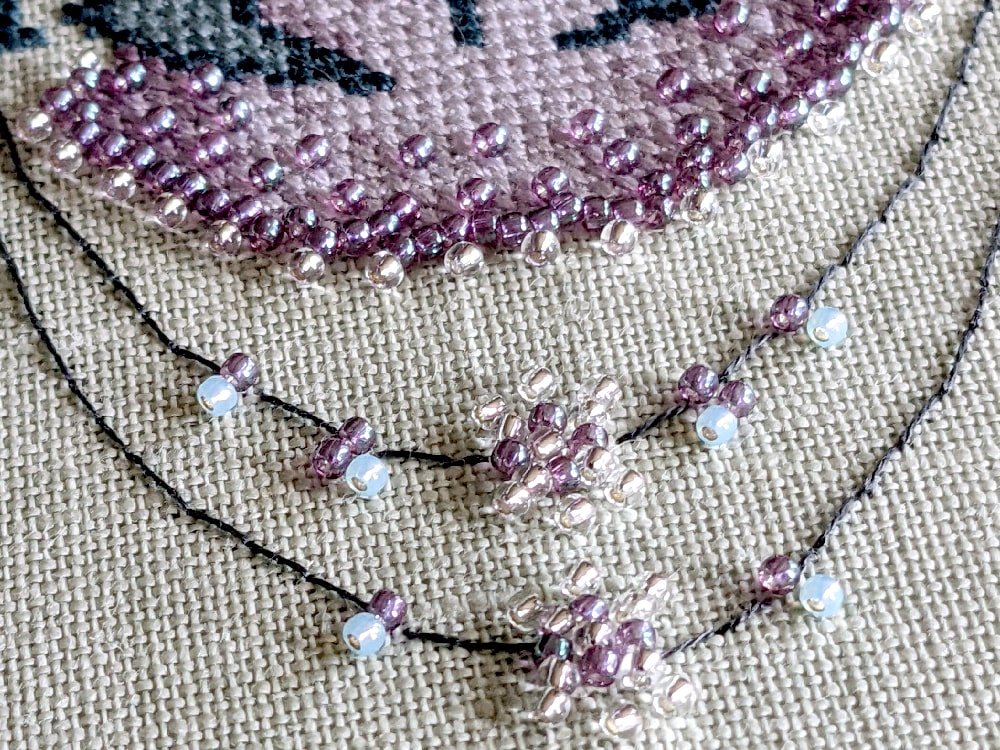
18828 > Toho 2116 11/0
00525 > Toho 206 11/0
02026 > Toho 21 11/0
If you want to know more about my color changing process, I have this helpful guide.
Framing the Cross Stitch
This is the first project that I custom framed myself. Usually, I would just try to find a frame with the right proportions (or close enough), but that can be really time-consuming, or sometimes not work out altogether.
I had wanted to try this for a while and finally got up the courage. I found a frame for $7.99 at the thrift store that I really liked with more than enough of the frame to cut down.
Cutting the Frame
I had to buy a few supplies that I didn’t have. Keep in mind that I live in a small apartment and do not have room for a miter saw at the moment, but an electric saw is much easier and worth the investment if you want to cut your own frames.
I bought this portable workbench so that I could cut down the frame on my balcony and wouldn’t have sawdust in my apartment.
I also bought this miter box. I prefer this one because it comes with the pegs to keep the wood in place while sawing. Miter boxes aren’t the most accurate but they work in a pinch. Again, if you can, use a miter saw.
Putting the Frame Together
Once I cut down my pieces to size, I used wood glue and miter clamps to hold the frame together while it dried.
Although not necessary, I bought a V-nail frame joiner. This adds another level of professionalism and keeps the joints secure. Generally, wood glue should be enough to hold together lighter pieces.
Painting the Frame
Did you know that you can go to a paint store and they can color match for you? I brought in my linen and had them make the perfect color to paint my frame.
The satin finish was perfect. I thought about adding a white or silver wash to highlight the floral details but loved the look of the flat color. It looked simple and girly.
Cutting the Glass
This was the first time that I had attempted to cut glass myself. It was a success! I just used the glass that came with the frame and this glass cutter.
I also added clear ⅛ spacers so there would be space between my finished project and the glass.
Final Thoughts
I am obsessed with how this project turned out! I couldn’t be more pleased with the finished result after customizing the frame.
I hope that baby Maya will love her fairy as much as I loved stitching and framing it.
I plan to custom frame more projects myself in the future. Subscribe to my newsletter to keep up-to-date on my latest finishes, cross stitch tips, and tutorials.
I would like to know how you mount your cross stitch. Thank you.
I used to use the pinning method. However, now I prefer to use lacing. Here is a tutorial.
My goodness you certainly put a lot of work into this! And it’s absolutely beautiful! I know your niece will just love it💗
Thank you 🙂
Hi there
I am starting your conversion of Nora Corbett’s Letter M-fairy. I am a little confused on the beads you replaced. Are there Mill Hill beads available for the conversion?The colours you have changed (18828 > Toho 2116 11/0
00525 > Toho 206 11/0
02026 > Toho 21 11/0)
don’t seem to match the picture you have put up on the blog. Thank you
Janine (Sydney , Aus.)
I am so happy that you like the conversion! ^_^
I purchase Toho beads instead of Mill Hill. There are more colors and you get more for a cheaper price. Toho 206 = Mill Hill 00206 and Toho 21 = Mill Hill 02010. The 18828 is fine for the original color. It’s the same color except the Mill Hill is a size 8/0 bead vs the 11/0 bead. Mill Hill doesn’t have that color in the smaller size.
I hope this is helpful 🙂