Should You Sign and Date Your Finished Cross Stitch Projects?
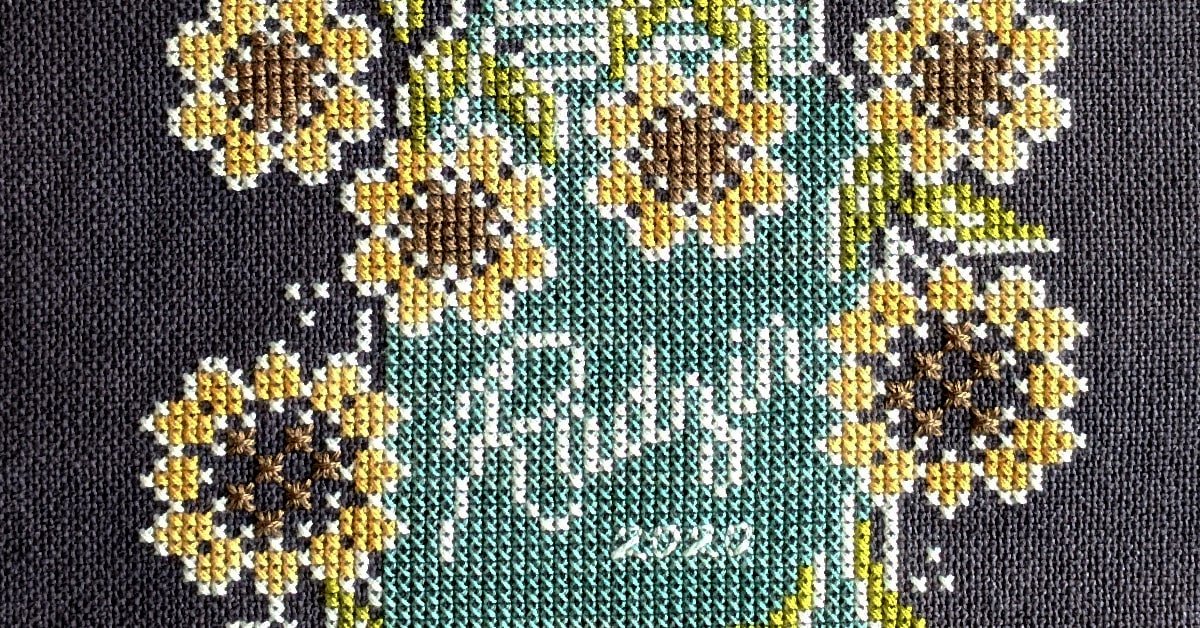
To sign and date your project or not to sign and date…these are the hard questions in life.
My grandpa would always reprimand me for not signing and dating my artwork. Today, it’s nice looking back on my art and seeing when I created it. However, that still doesn’t motivate me to sign and date my work.
There are many stitchers who always initial and date their projects and others who don’t, but which will you be?
When I am trying to make a decision, I always make a pros and cons list. Just like with any other decision there are advantages and disadvantages to initialing and dating your work.
WANT FREE CROSS STITCH PATTERNS?
Sign up for my newsletter to get access.
Reasons You Should Sign and Date Your Cross Stitch
You should sign and date your cross stitch project so you remember when you did them. It’s very common for creators and artists to add their information.
If you have stitched for many years and always date your pieces, you can notice progression along your stitching journey. It’s nice to be able to see that improvement. Maybe your stitching isn’t as tight as when you started or your stitches are neater.
Adding your name and date is especially important when you are giving away gifts.
As a recipient, I would want to remember who gave me what and when. It’s something special that has sentimental value. I also enjoy receiving handmade gifts.
I would like to think that some of my more elaborate pieces would get passed through generations. It’s something that would keep your memory alive. I wish I had something that one of my distant relatives had made.
Luckily, my grandpa always signs and dates his paintings. In fact, I have one of his paintings and a wood carving of his hanging in my house right now.
He signed the painting inconspicuously under the mat. You can see a little bit peaking out.
Reasons You Shouldn’t Sign and Date Your Cross Stitch
You might feel like it’s unnecessary, especially if you keep your projects to put your initials because obviously, you made them.
Even if your descendant doesn’t receive it, maybe someone finds your work and appreciates it enough to bring it home. I would think it’s cool to know when it was made. Like having a piece of history in your home.
You don’t want to add your name and date because you feel like it is a distraction from the stitching.
There are many different ways to incorporate these details into your work that don’t affect the finished piece.
7 Different Variations To Add Your Name and Date onto Your Project
Keep in mind that your signature can be anything from your initials to a symbol that represents you.
The smaller the better. If you are working on evenweave or linen, try adding your name and date over 1 instead of over 2.
Sometimes you don’t want your name and the date to be so obvious.
1. Stitch in a Color Similar to Fabric
If you want your signature to be a little bit more subtle, choose a color that’s a similar shade or a shade off from the background color. This will help keep the focus on your actual stitching because your eye won’t be drawn to your name and date.
It won’t be competing for attention by being loud and obnoxious.
2. Make Your Name and Date Look Like Part of the Project
Instead of placing your initials and date out in the white space, put it closer to your finished stitching.
You can place it at the bottom where there is a flat portion or, if possible, try having it move with the curvature of the piece. This way your name and date will blend it more.
Another option is to have the details going vertically up the side of your stitching.
3. Backstitch Your Name and Date on the Cross Stitch
To blend in your information you can backstitch your name and date on your cross stitch so that it isn’t in the white space.
You can stitch in a similar color to your cross stitches or in a complementary color. For example, if your project has a woman in a purple dress with green flowers, you can add your name and date in green on the bottom of the dress to match the rest of the pattern.
4. Stitch the Details on the Back
If you’re still worried about your information too noticeable on the front, you can stitch your details on the back.
You can stitch your initials and date on the felt backing of a hoop.
If you are framing your stitching and don’t want the information to be obvious you can hide it on the extra fabric that gets folded around the board.
The only way someone will be able to see your name and date is if someone disassembles the frame.
5. Add a Sewing Label to the Back of Hoops
If you’re finishing your hoops with a felt back, you can attach a sewing label. You can get these custom made or make your own. Either way, this method is a simple, professional way to add your information to a keepsake.
6. Write with Marker or Pen on the Backing Board
Don’t want to stitch your name and date? You can just write it on the backing board. The backing board is the board behind your project or sometimes what your project is mounted on.
You can also add a personalized message if this is a gift.
If your project is then covered by a dust cover, the name and date will be concealed.
7. Stick a Mailing Label on the Back
Why not add a sticker or address label to the back of your frame? Nobody will see it in the front, but you will always know it’s there.
This is a great option if you want to include more information about the piece as well. Maybe the designer, fabric count, and dyer.
Many framers will put their information on the back of the dust cover once they are done framing. Again, because this is on the back it will not detract from the piece, but all you need to do is turn it around to see the details.
Final Thoughts
I’ve always been really bad at adding my name and the date to finished projects. However, there are plenty of options to start to incorporate this information so I’m going to have to give all of these a try.
Don’t let your name and the date take away from your stitching. Try toning down the colors so that they blend more into the piece. Unless of course you like it to be obvious.
If you don’t want to add your initials and the date to the front, you can always add it to the back for a more discreet option.
I really like the idea of adding a sticker with all the details of the project as well as my name and date.
Happy Stitching!



So happy I found your blog.😀