Letters from Mermaids S by Nora Corbett: My First Finish of 2021

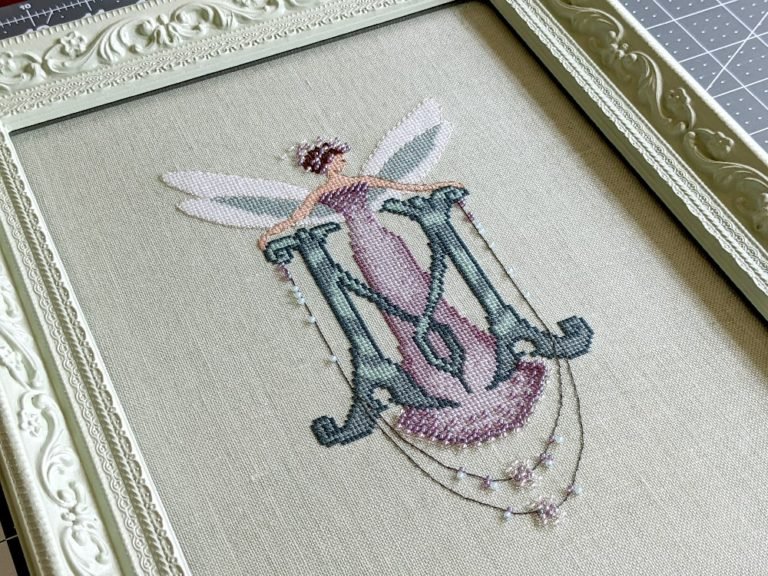
I am so happy to have finally finished her. She was a start from Stitch Maynia 2020.
She was so much fun to stitch and came out beautifully. This is the first from the Letters from Mermaids series, but I did two Letters from Nora last year for my aunt and mom. They are always so much fun to stitch up.
Not only are they quick but they also have that same Mira/Nora elegance with the beads and some use metallics.
If you are nervous about starting a huge Mirabilia or if they are simply out of your budget, try starting with one of these Letters to get into the swing of things.
They use fewer beads, and if you don’t want to spend the extra money on the variegated thread, you can convert the colors to DMC or change the color palette completely.
This Nora Corbett design was the first one where I used all the called-for materials. It’s also the first time I completed a project on linen.
WANT FREE CROSS STITCH PATTERNS?
Sign up for my newsletter to get access.
Notes on the Floss – Classic Colorworks
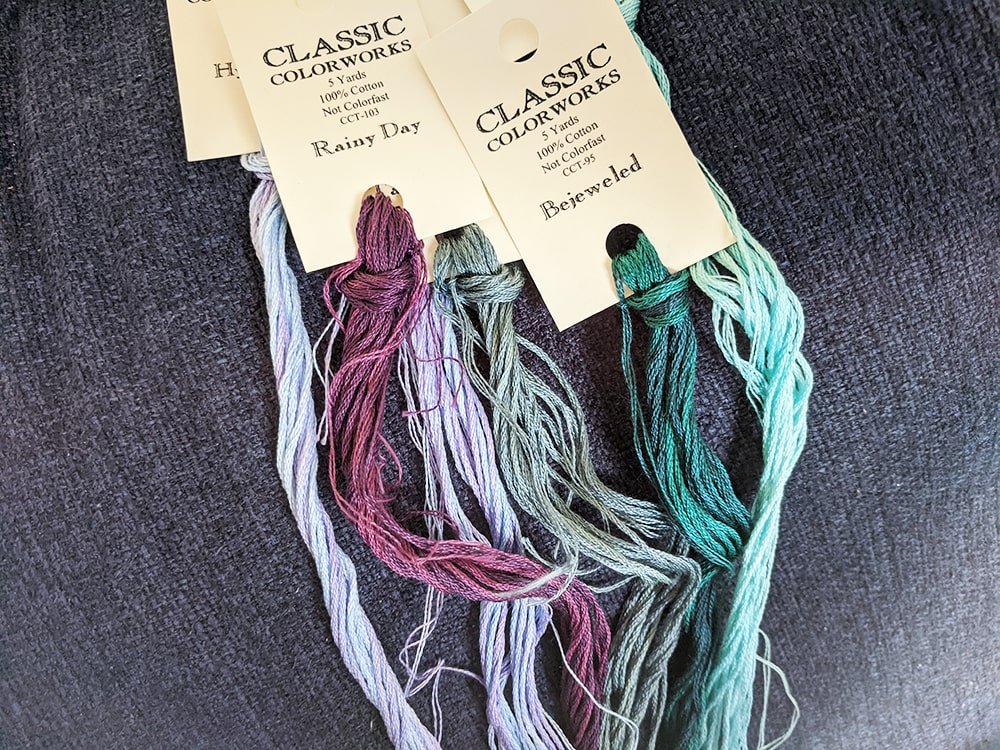
I just want to start by saying that the colors on the model photo do not do this piece justice. The colors look muted and murky while the actual colors are a rich, jewel-toned palette.
It’s rare that I spend the extra money on the variegated floss, but I knew, in this case, it was a necessity. I am ecstatic with the results.
At first, when I saw the color Cobbled Peach I thought that it was way too pink for the skin. Ultimately, I think it worked out fine.
I’m not crazy about the blended threads. I think that it is a little jarring because the colors are so different. One is very dark and the other very light.
Normally, I would be obsessive and made sure that every stitch was consistently the same, but I decided to wing it. I noticed that the blends ended up being a little darker at the top of her tail.
A good compromise would have been to find an intermediate color or just to overlap them by having a few stitches of one color integrated into the other, which is done in the pattern anyway.
There are two colors listed that, in hindsight, I don’t know if I would have bought them both – Hydrangea and Vintage Violet. There are plenty of places that I couldn’t tell if I had stitched one color versus the other because they are so similar.

They are both purple and blue and one is slightly darker than the other but barely. Again, in my opinion, it’s not worth it to get both. It will just confuse you.
La Tierra is only used as one strand for the small amount of backstitching. Instead, opt for DMC or you can use the other brown that was used for the mermaid’s hair, Bramble Bush.
Notes on Variegated Color Direction
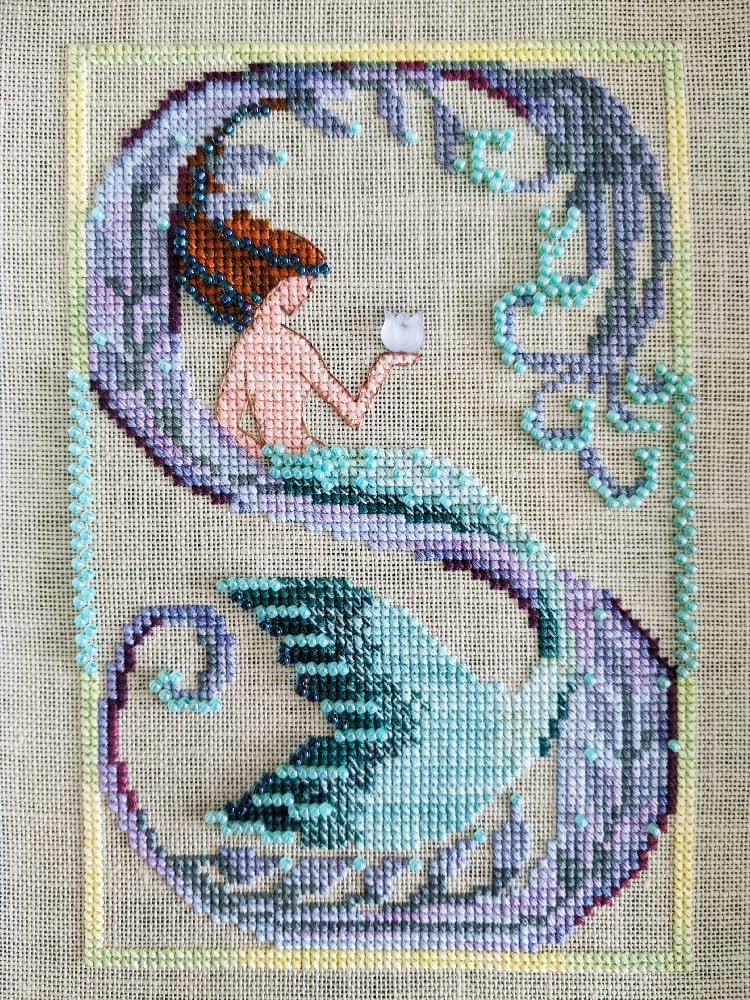
The Border
I wanted my borders to match. I am weird about symmetry. If you aren’t then this is unnecessary.
I started with the top border to begin my pattern. I started in the top left like I always do and went to the right. Once I got to the end of that line, I went down to the second line and finished the left side.
When I was adding the right side, I didn’t like the abrupt change in color (green to yellow). I didn’t use the green side because it would take too long to start changing. So I cut the thread to the part I wanted to start.
It’s still a little off but good enough not to bother me.
With the bottom border, I was smarter. I started on the left side under the beads with the green side. When I got to the bottom, I started stitching two by two vertically so that by color would start and end at the same time.
Once I ran out, I started on the right side, with the green side of the floss. I was hoping that they would meet in the middle but I was a little short. I just fudged the rest with parts of yellow in the middle.
There is some variation in the yellow color but again not enough to bother me. Doing this was a better method if you want consistency with your color transition.
Hair and Skin of the Mermaid
I tried to use the variegation to my advantage to create highlights and movement in the hair.
Next, I tried to create those same highlights in areas of the skin, which I started to do, but then didn’t know what to do with the main body so I ended up accidentally giving her tan lines.
I decided to leave it because I think it’s hysterical.
Stitching the S
There was a part on the lower section of the S where two sections of the color weren’t lining up so I ripped them out and restitched them to be more cohesive.
The Mermaid’s Tail
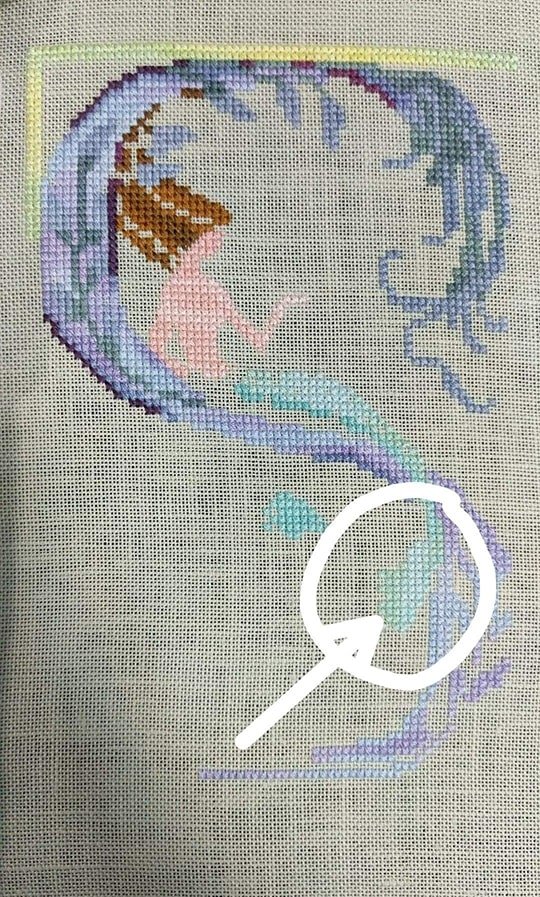
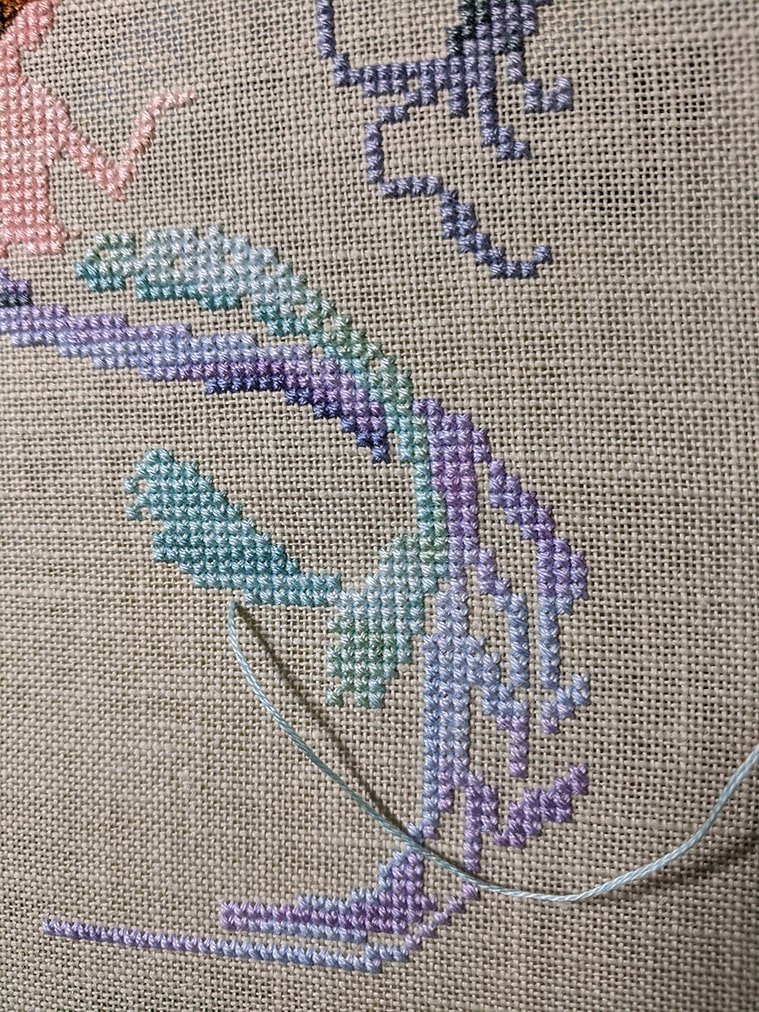
I stitched her tail vertically because I thought that it would make more sense. When I got lower there ended up being long vertical streaks that didn’t look right, especially because everything else was stitched horizontally.
I put her down for a while because I didn’t feel like frogging a section of stitching. It seemed like too much of a hassle.
At some point, when I didn’t feel like stitching but wanted to be productive, I finally took those stitches out. It definitely needed to happen. Now, I feel so much better about the way it looks.
It’s always worth it to go with your gut and rip stitches out if you aren’t happy.
Notes on Beading
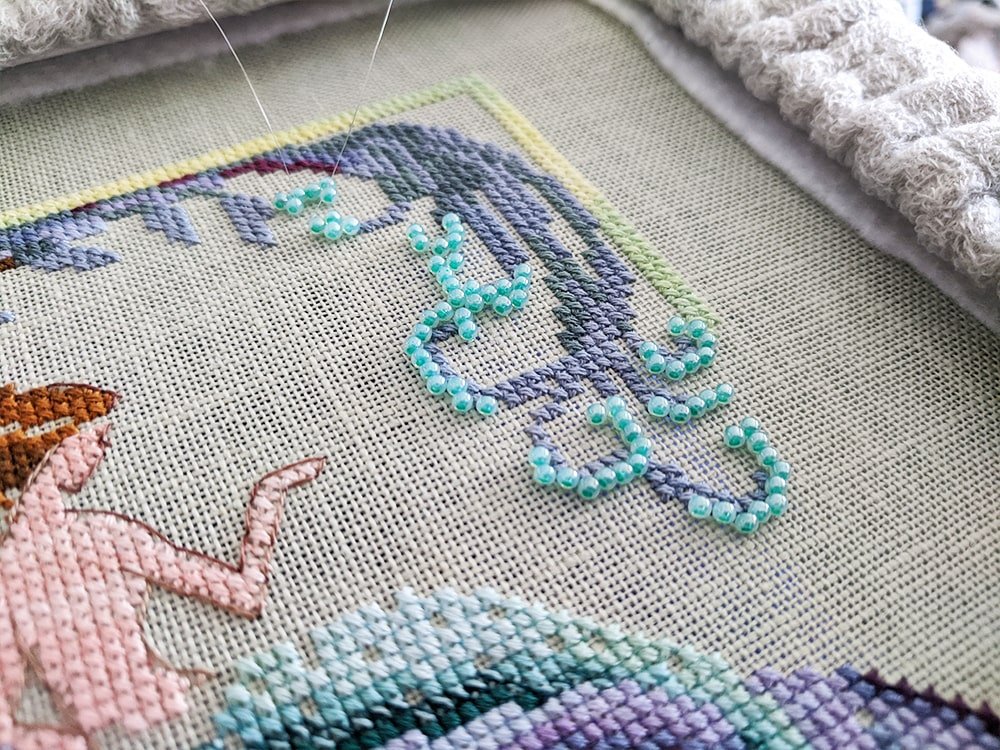
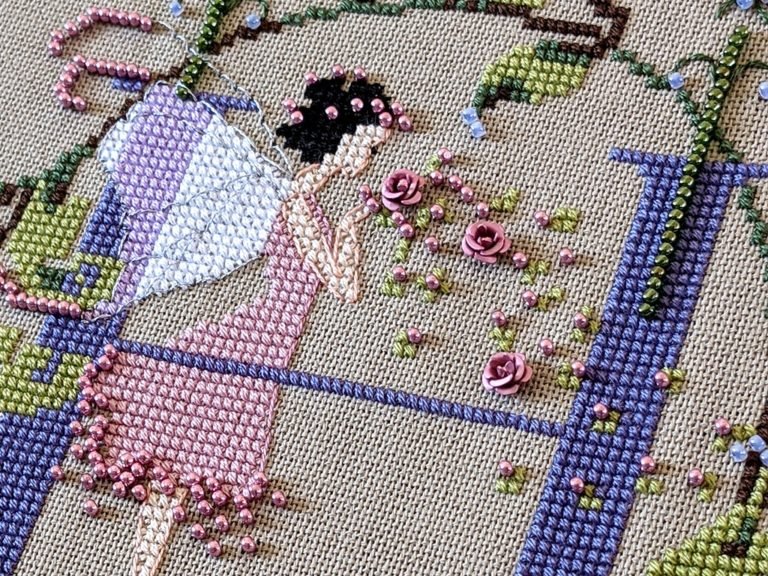
I had discovered from my previous Letters that I like the appearance of the diagonal beads, which was surprising because I like symmetry.
This was my first time using YLI Invisible Thread. It was tricky at first, but eventually, I got into a groove.
I used a long strand of thread and folded it over to start with the loop method. Eventually, I added a double knot to the part around my needle so the thread stopped slipping out. The knots are so small that they don’t get in the way.
I created a half cross stitch going through the bead, then completed the X by splitting the two threads on either side of the bead. This made my beads extra secure.
I would say that creating the full X isn’t necessary for diagonal beads, especially when they are smaller. If they are bigger beads, securing them will help them from wobbling.
I ordered all my supplies from 123 Stitch. However, I was disappointed that they didn’t seem to sell the Mill Hill Treasure that I needed. I don’t think I could get it anywhere at the time.
Luckily, I found the Mill Hill Treasure at my LNS, Needleworker’s Delight. I was so thrilled that they had it.
Notes on the Pattern
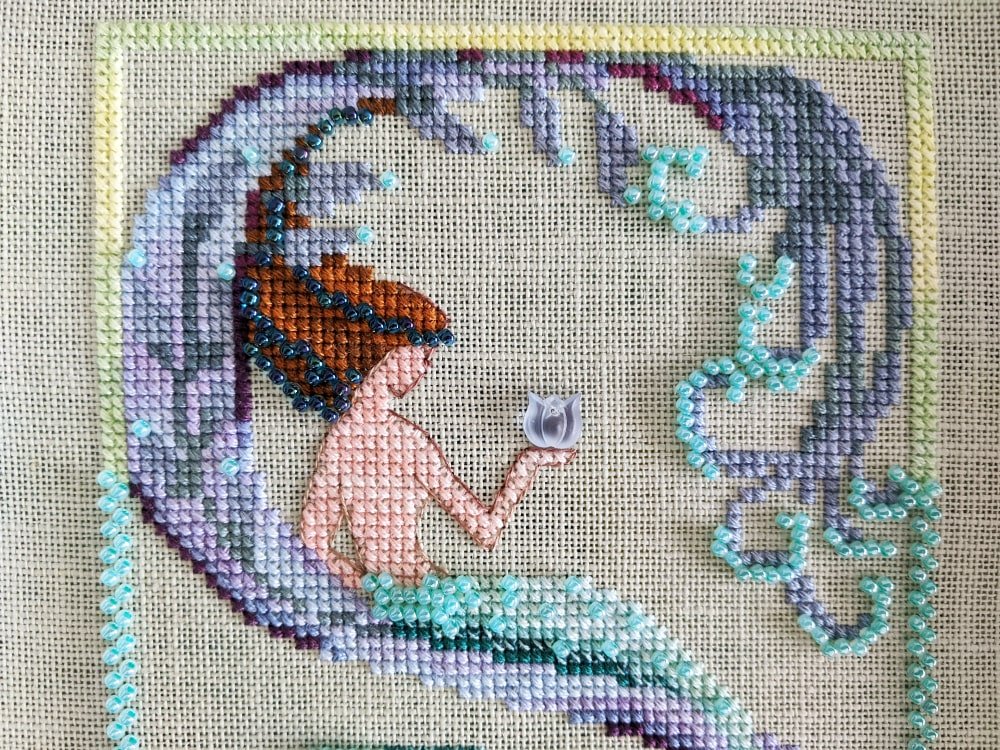
I noticed that on the top portion of the borders where the stitching meets the beads, there is a stitch next to the beads. This is mirrored on the right side.
On the bottom, there isn’t that extra stitch. If you want I would include that extra stitch at all four points or get rid of them at all four points for consistency.
I left mine the way it is charted but thought it was weird.
The mermaid’s back looked a little unnatural to me so I smoothed out the backstitching.
At the tips of each of the leaves, there’s a bead. I didn’t realize when I was stitching that there’s one on the left part of the S where there is a bead missing. I would have added one if I noticed there wasn’t one.
I noticed there was one bead missing on the bottom leaves so I added one.
There’s a bead on the dark purple to the right. You may want to move it onto the lighter color so that it doesn’t break up that outline.
There are three beads missing on the pattern on the left of the cluster where her skin meets the tail. If you look closely at the model there are beads there.
I added the beads after it was finished then took them out. I decided it looked better with fewer beads. You can’t see the backstitching there if you add the extra beads.
You may want to add the extra beads or add stitches for her arm.
Final Thoughts
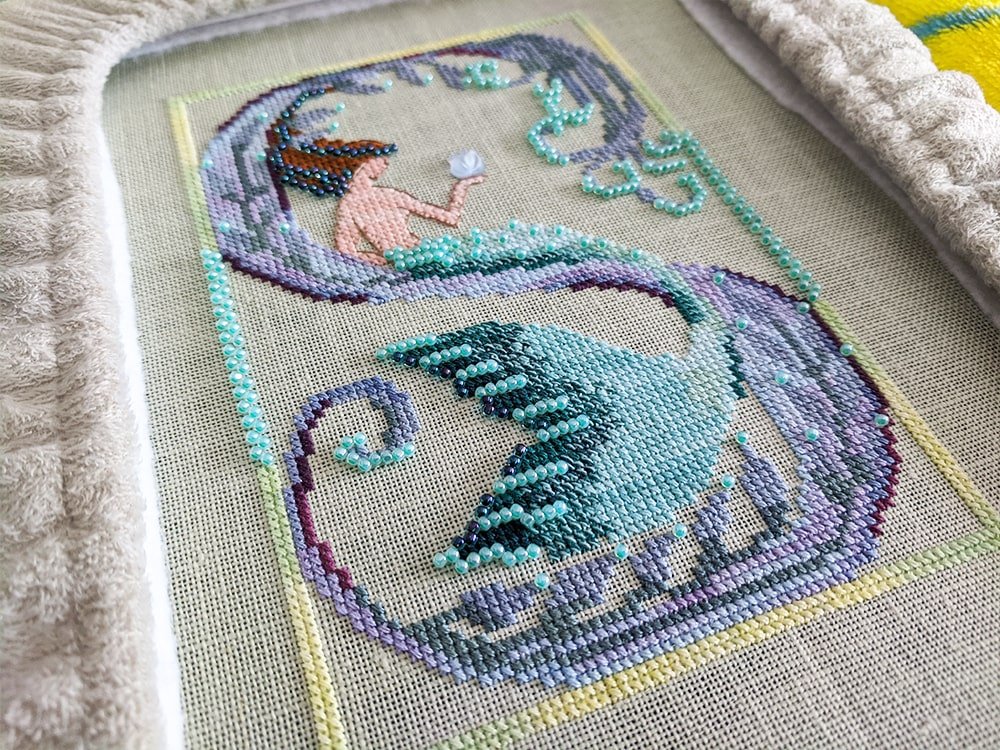
I loved this pattern so much. She is so gorgeous.
You may not want to get all of the colors unless you already have them in your stash. Hydrangea and Vintage Violet are too similar to be noticeable. La Tierra is only used for a small amount of backstitching.
If something is bothering you about the pattern, change it. If you want parts to be more consistent fix them to your liking. If you don’t like how your variegated floss is coming out, redo it.
Ultimately, you will be so much happier adding those little changes in the end after all that stitching.
Happy Stitching!


