The Best Way to Organize Embroidery Floss [Without Bobbins]
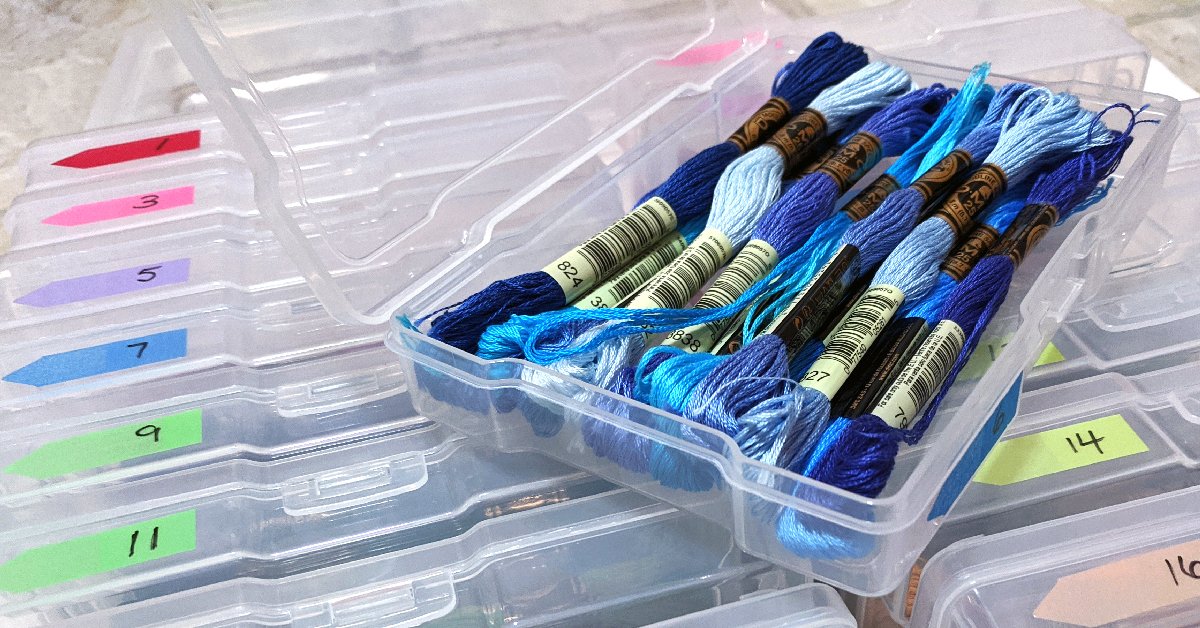
At some point, I became overwhelmed with the amount of embroidery floss in my stash as well as frustrated that I couldn’t organize it fast enough.
At first, like many crafters, I bought the boxes and bobbins. However, bobbinating wasn’t cutting it. I even bought the doodad to help speed up the process by spinning the thread. Still, it was very unenjoyable.
I’ve seen people use an electric drill to try and speed up the process, this also may be an option if you prefer using bobbins.
I didn’t want to waste my precious time spending hours organizing my thread. After all, that time could be better spent actually cross stitching.
The bobbin method is certainly a chore, especially when you get a huge amount of floss at one time.
The best way to organize and store embroidery floss is to use 4×6 photo boxes and the DMC color card. With this system, your floss stays organized, clean, and most of all you save lots of time!
These boxes also don’t take up a ton of room. If you are like me and live in a small apartment or just want to conserve space, the space saving is a bonus.
WANT FREE CROSS STITCH PATTERNS?
Sign up for my newsletter to get access.
Using the Color Card to Organize the Floss
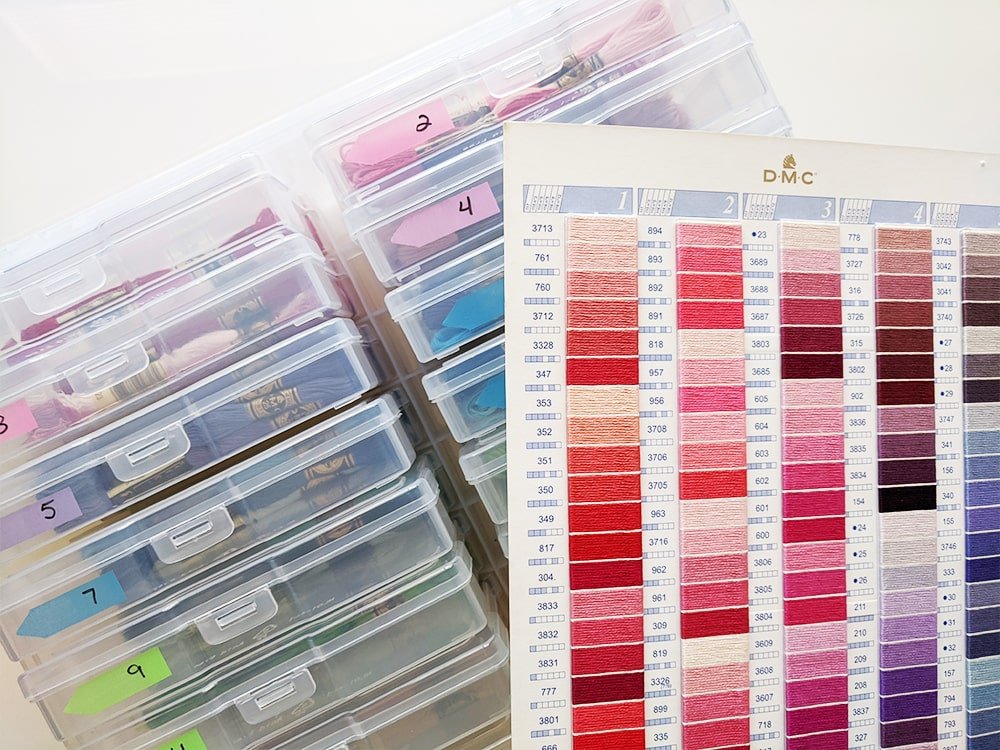
First of all, if you do not have a DMC Color Card with real floss, I highly recommend getting one. This is especially helpful if you plan on switching colors or creating color conversions.
The real floss is better than the printed one because it will give you a more accurate depiction of each color.
The 489 solid DMC flosses are broken down into 20 color groups. Each color group can be broken down into several color families.
I organize each color group into one of the photo 4×6 photo containers.
The Boxes for Storing the Floss
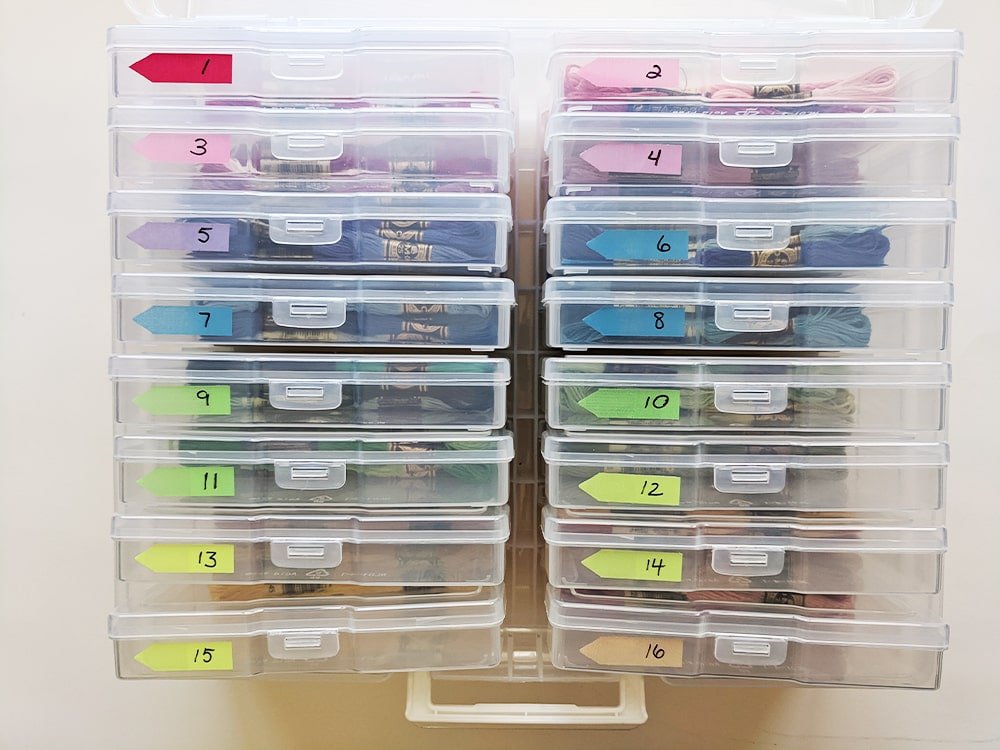
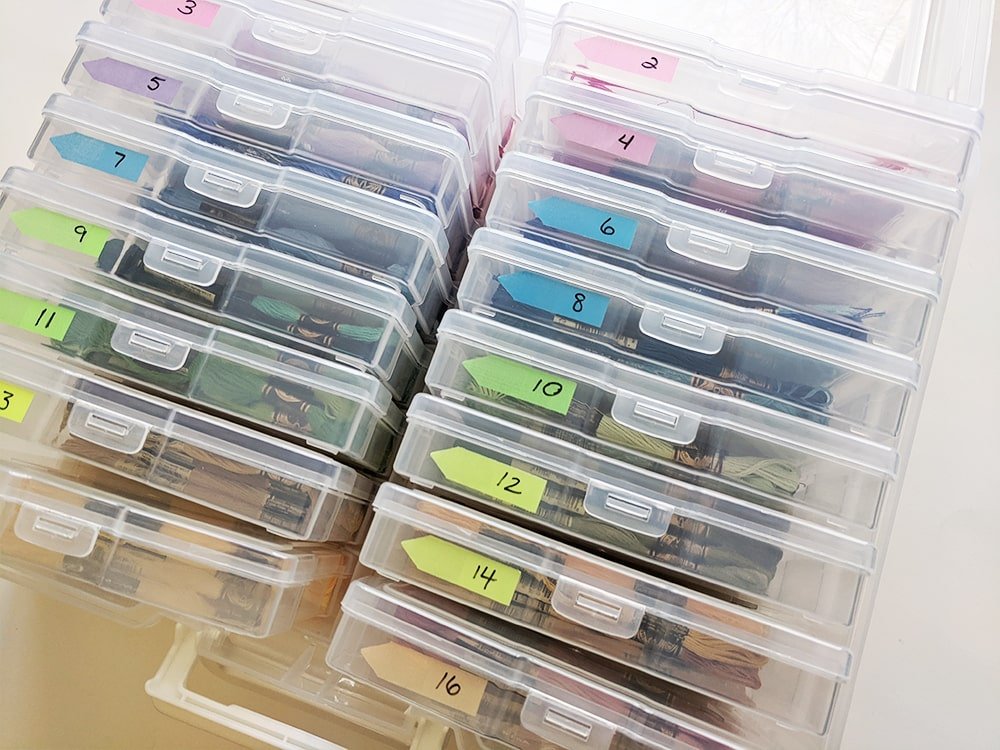
Each plastic case has 16 smaller compartments. I bought 2 cases that stack neatly on top of one another to store all my floss. Containers 1-20 accommodates the solid DMC floss that I have in my stash.
The remaining containers store various other threads including DMC metallic, DMC Coloris, Kreinik, and other “fancy floss.”
There’s an option to get the rainbow variety of containers, but I got clear so that I could see the floss colors clearly. I added colored labels that match the floss inside each box.
For example, the first group on the color card contains reds. The first box in the case contains all my Group 1 floss, the second contains the pinks in Group 2, the third has pinky-purples in Group 3, and so on.
This organizational system is extremely visually appealing. Equally as satisfying compared to bobbins in my opinion.
At this point, I pretty much know which container has the color I need.
Keep Floss Clean with the Hard Shell Protection
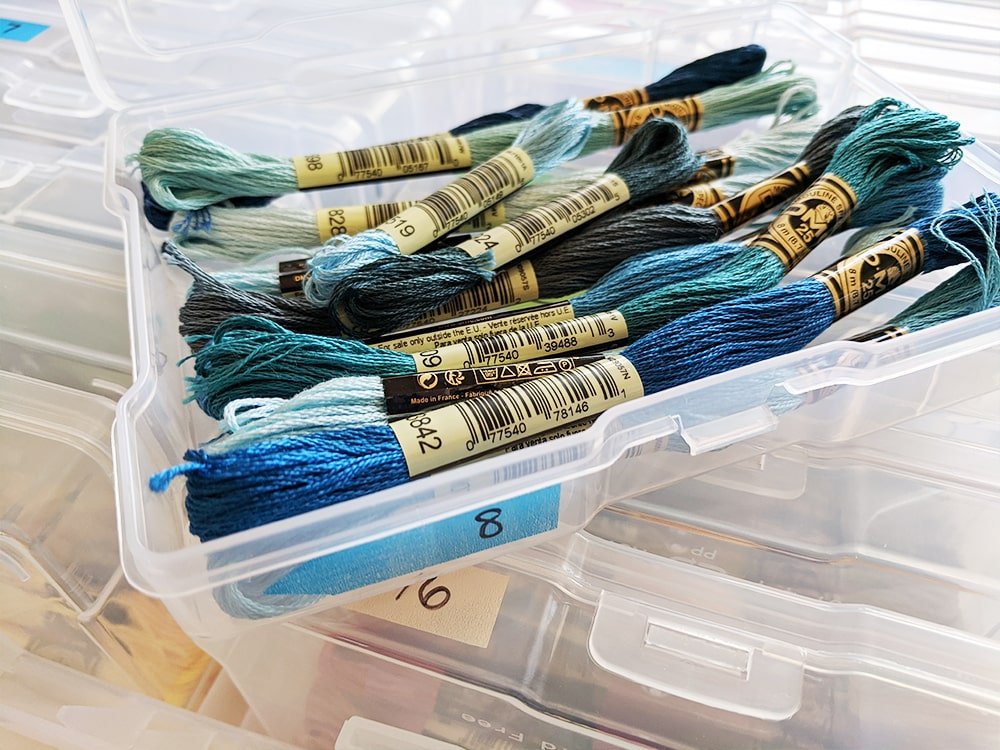
I prefer these hard plastic shells because they keep my floss clean. They aren’t exposed to dust or cat hair.
The 4×6 case perfectly fits the threads. One thing I can’t stand about the bobbin method is the crimps that are created from winding the floss around the bobbin.
Because the containers are hard plastic, my floss doesn’t become bent or deformed. I know this is a minor annoyance, but I don’t like when my floss has weird bends.
Because there’s no need to do anything to the skein, the floss just has the subtle bends from the loops. I use these bends as increments of measurement when cutting my floss.
Space Saver
I’m not sure exactly how many of the bobbins you can fit into a container, but I usually see people having multiple containers. I feel like it just takes up a lot of room.
I’ve seen other methods where people have more elaborate complex storage systems, but again more space is needed. Maybe one day when I have a craft room, all my stitching supplies will be perfectly organized.
All my floss fits in these two 12×12 cases and fits neatly on my small dresser.
Save Time by Not Winding Bobbins
My favorite benefit of using this storage system is the amount of time I save not having to wind bobbins.
I just buy the colors that I need for a particular project, record them in my floss inventory excel sheet, and put them in the containers when I’m done stitching with them.
It’s a beautiful system!
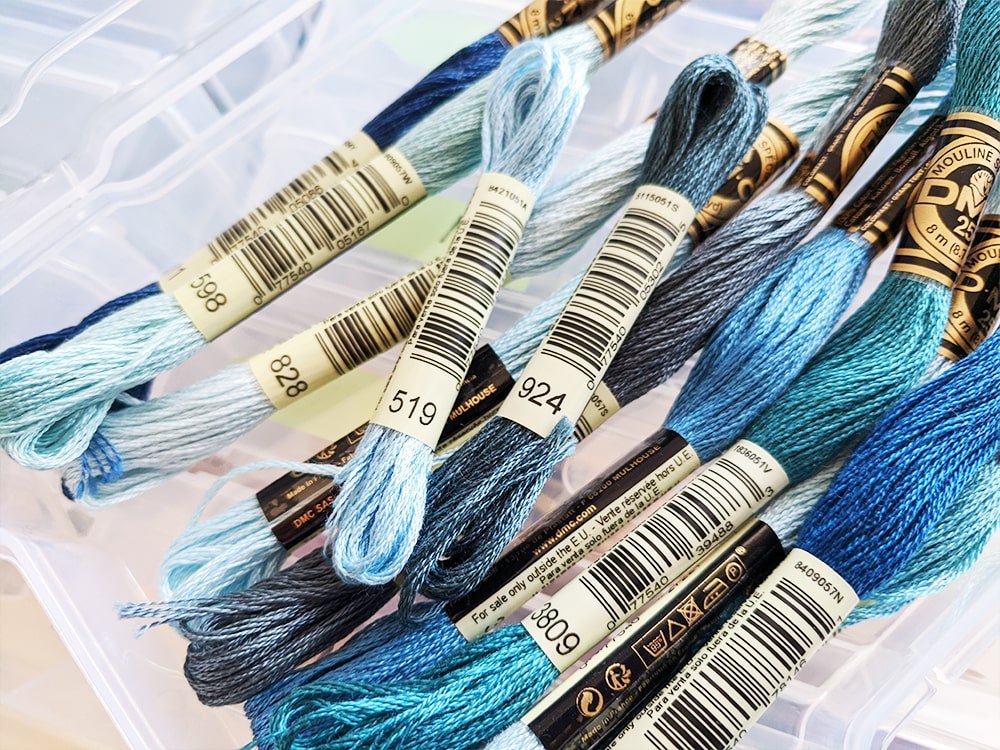
If I use a lot of the floss and the wrapper keeps coming off. I wrap it around my fingers and place it through the number part of the wrapper, creating a mini skein.
No muss, no fuss.
For me, it’s just a huge waste of time to spend what could potentially be hours winding bobbins when I could using that valuable time to stitch.
Final Thoughts
There are tons of floss storage ideas and inspiration on Pinterest, but this by far my favorite. I was so glad to find a method that doesn’t take up any time and is so simple to implement.
Again, I didn’t want to deal with spending so much time organizing my floss instead of actually stitching.
Now I have more time to put towards my hobby, and all my floss is organized how I like it and with a method that works for me.
Are you tired of bobbinating and searching for a better option? Give these plastic storage boxes a try and free up more of your time for stitching.
Happy Stitching!


Can you please tell us where we can purchase these boxes?
These photo boxes are the ones I purchased.
Stephanie, thank you so much for this great organizing idea. In reply to someone who asked where to get the storage case and individual boxes, I checked on Amazon which has a variety. I ended up getting mine at Michael’s Crafts. Originally $42 but as of right now 2/23/22 case is on sale and comes in clear with 16 storage boxes. I also had a $5.00 voucher reward so I only spent $10; that’s a great deal!
Question for Stephanie, or anyone out there, if I don’t want to purchase the thread card (it’s a bit pricey. All I want to do is know what the names of the 20 color groups are for the 6-strand cotton thread, and the DMC #s that would go into these color groups. Also, Stephanie mentioned that in those color groups, colors can be organized even further by color families and I would love to be able to find out what those color families would be and which DMC #s would go into those families. I’ve been trying to search it on the web and haven’t found a list yet or that information. I even checked on DMC website. Any help would be appreciated. Thanks so much again for your ideas and information Stephanie; greatly appreciate it! 🙂
That is a great deal for the photo boxes!
You can find digital ones. Lord Libidan has one on their website. I prefer the actual thread one because it is helpful when picking colors for projects.
The groups are numbered 1-20. The names of the color families can be found by Googling the number. They will usually be grouped together on the chart but sometimes not. For example Group 1 consists of reds. Within Group 1 there will be Very Light Red, Light Red, Medium Red, Dark Red, and Very Dark Red (this is just an example. The colors have fancier names like Coral or Garnet. Not all color families have the same amount of shades). I hope this helps 🙂
hi, great web site, alot of good ideas. do you have the list of the 20 groups? im trying to organize my stash and at the same time geta better understanding of the color theory concept, do you know what is the logic behind what Columbs are in each group?
Thank you. Here is a downloadable color chart from Lord Libidan: https://lordlibidan.com/dmc-color-chart/. I’m not entirely sure on DMC’s dyeing process to create the families within each column and colors have moved around after adding new ones. However, for the most part, the chart seems like a gradient. For example, red and blue make purple in color mixing. Hope that makes sense 🙂
I actually started using photo boxes, but the long ones used to hold envelopes of photos, I own four of the long boxes, they hold a basic sized envelope. I then took a bunch of envelopes, numbered them with each DMC number , put each numbered skein in their corresponding envelope. All of my 666 reds go in that envelope. All of the 310 black threads go in their envelope. The envelopes then are stacked forward in the boxes numbers showing in numerical order. Makes it easier to see what I have and which envelopes I need to replenish before starting another project.
It’s great in the colder months when you want to start a project but too cold to get threads. All of my envelopes have at least one or two skeins for each envelope. I can pull the envelopes I need for a future project and these plastic storage boxes keep the threads free of dust and humidity.
In the warmer months I take stock of the threads needed. Buy the threads and store them in the envelopes. I also use standard index cards for wrapping loose threads in the envelopes. This system has worked for me for over 30 years. I needed to do this after receiving threads from other people. Hope it helps someone else.
Hi Stephanie,
I just found your storage for floss idea! I do the same thing with only one change, I sort my regular DMC floss by floss number. I have the printed DMC floss chart and I use it all the time. My extra boxes are also used for specialty DMC floss types. I usually search by DMC number from the chart and not always color. Great information and tips. Thank you so much.
thank you!
Thanks for this. I like leaving my floss in the orig skeins, and have been searching for solutions. This looks the best! I didn’t know DMC had the color chart with real floss, I have the printed one, and it’s hard to tell. Thanks so much!
I’m glad that you found this helpful 🙂
Wonderful ideas! Thank you. I’ve been struggling with how to organize my threads and this is the best idea I’ve seen so far. Bobbin winding is a waste of time. However, I do have many bobbins of thread and wonder how to integrate them into your organizational idea. Any suggestions? Just put the bobbins in the photo boxes?
Thank you. I agree that winding bobbins is a waste of time. You could put the bobbins in the boxes. I have a few bobbins that I have in a bobbin box until I use up that floss.
I just had an additional question. You mention keeping track of your threads in an excel spreadsheet. Would you please comment on how this helps you stay organized and how your spreadsheet is organized? Thank you so much.
I use Lord Libidan’s Thread Inventory Spreadsheet. It’s convenient when I’m out and need to pick up floss. I uploaded it to Google Sheets and can view it on my phone.
You’re not going to believe this but, earlier today I was organizing my embroidery things which were a total mess. Thought to google floss organization and your photo was was one of the top returns and looked impressive. Followed the link to this page and was thinking I wouldn’t find your organizer but lo and behold – they’re on sale at Michaels for 70% off! I’ll be able to pick it up curbside tomorrow! Thanks so much for the great idea!
Nice! I’m so glad you found this helpful!
Thank you so much for the link to the digital DMC inventory. I’ve been a cross stitcher and needle pointer since the mid-1970’s and have gone through MANY ways to store floss, threads and tapestry yarns. If I were starting from scratch I would certainly use your method, but in 2001 I inherited my Dad’s collection of floss, which was beautifully put up on bobbins and inventoried in plastic storage boxes. I just continued his process as I transitioned my supples and completed my DMC collection. (I found that I could wind floss while plodding along on my exercise bike in front of the television!) My Dad was a Sergeant Major in the Marine Corps and found both needlepoint and cross-stitch to be very relaxing. ( “ It’s healthier than scotch and cheaper than a psychiatrist!”)
That being said, I will probably use your method to finally organize my non-DMC floss and all my other threads and tapestry yarns.
You have also convinced me to try washing my fabric before stitching it. I have always done that when sewing, but had never considered it for cross stitch.
This is exactly what I was considering to organize a lot of my extra skeins by keeping them flat and not on bobbins. I am just curious as to how many skeins will fit in a box without overcrowding. I was strongly considering ordering this just this morning.
Thank you
Honestly, I am not sure. I want to say at least 30 skeins. You can always return the item if it doesn’t work out for you 🙂
looks like great idea for floss storage. I’m curious about how many skeins will fit within the box without being crowded like sardines. Would like to order these for myself but want get enough sets. I like organize my overflow floss by number and recently did a sort out and I may need an intervention for my habit of buying duplicate floss. Downloaded the inventory sheet and getting organized. Thank you
Can you explain (and show) what you were saying about how you keep the numbered wrapper connected to the floss when you’ve used a lot of the skein? Thanks!
I fold over the skein to make a thicker, mini skein. Thicker will allow the label to stay on. There is a pic but I could add more of how I actually do it. If the extra bit is so small that this doesn’t work, you could always add it to a floss drop. 🙂 Hope this was helpful.
I have only recently started back up cross stitching and I use these boxes. Right now I only have a few small projects worth but I also will keep the skiens of thread that belong to a current project in one box all together. I throw it in my bag when going out and everything stays nice and neat.
Brilliant! I can’t stand the crimps with the bobbin method either.
Just stumbled across your blog after googling for ideas about how to organise and store my cross stitch threads. This is such a brilliant idea. I have just ordered myself all the necessary kit (from Amazon & EBay) and I can’t wait to get my threads more organised. I’ve been using a very old plastic ringbinder folder with Lo-Ran thread cards, and also a separate plastic box with various oddments and threads by other makers. But my growing thread collection is outgrowing my current system so I need something more efficient that doesn’t take up too much space. This idea is perfect. And as I have a lot of threads which have to be transferred from thread cards I have ordered some small clear self sealing bags which I can label and store them in, inside the photo boxes. Thanks for the inspiration!